Creating a New Run
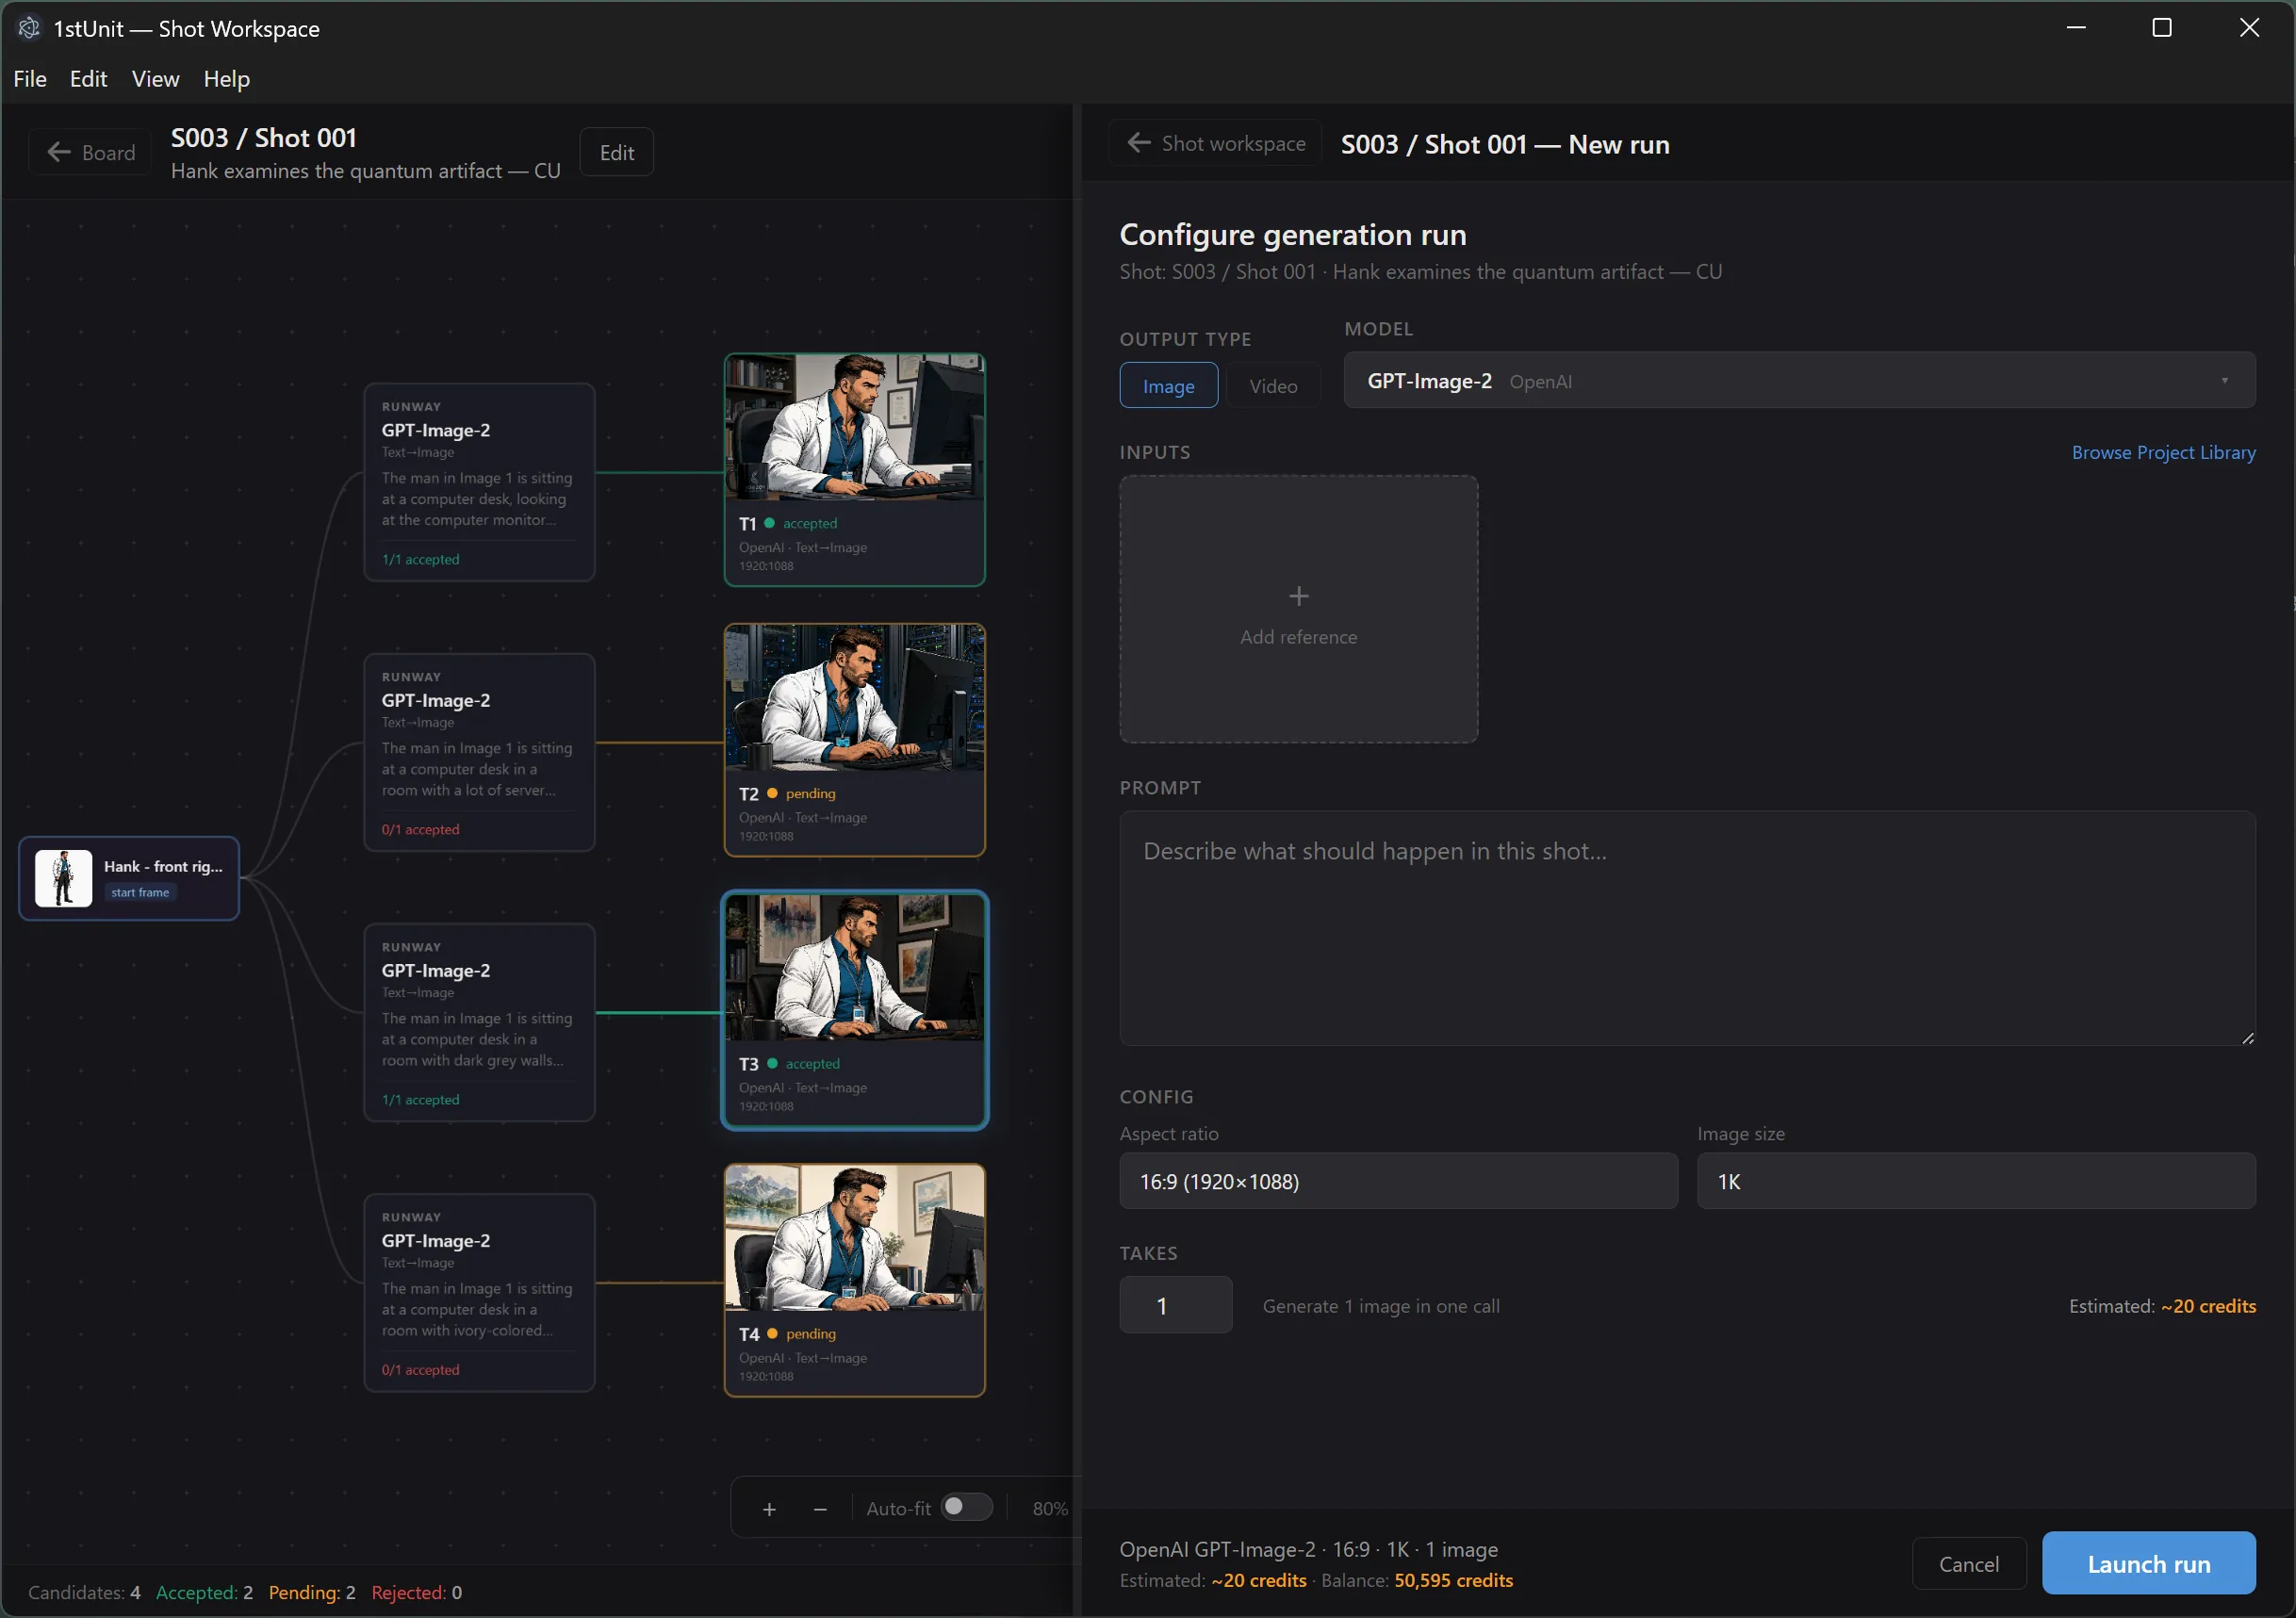
A run is one generation request sent to Runway. It is set up with the New Run form, which slides in from the right side of the shot workspace. This page walks through every field and explains how the form adapts to the model you pick.
Opening the form
There are two ways to open the form, and they behave differently:
- The New Run button in the top right of the shot workspace opens a clean form: no prompt, no inputs, no model selection from any prior run.
- The + New run card at the end of any lineage group on the Candidates tab opens the form pre-filled with that lineage's prompt, inputs, model, mode, and config. If you launch without changing anything, the new take lands in the same lineage group.
The Regenerate button on an artifact's detail panel works the same way as the + New run card. It opens the form pre-filled from the artifact's source run.
The form, top to bottom
The form has the same overall shape no matter which model you pick. Sections appear, hide, or change shape based on the model. Here is the order:
- Output type (Image or Video) and Model picker
- Input tabs (Seedance only)
- Reference inputs
- Prompt
- Config: duration, aspect ratio, resolution
- Takes, audio, and estimated credit cost
- Advanced settings (model-specific)
- Launch button at the bottom
Output type and model
The Output type pills (Image / Video) sit on the left, with the Model picker on the right. They share a row.
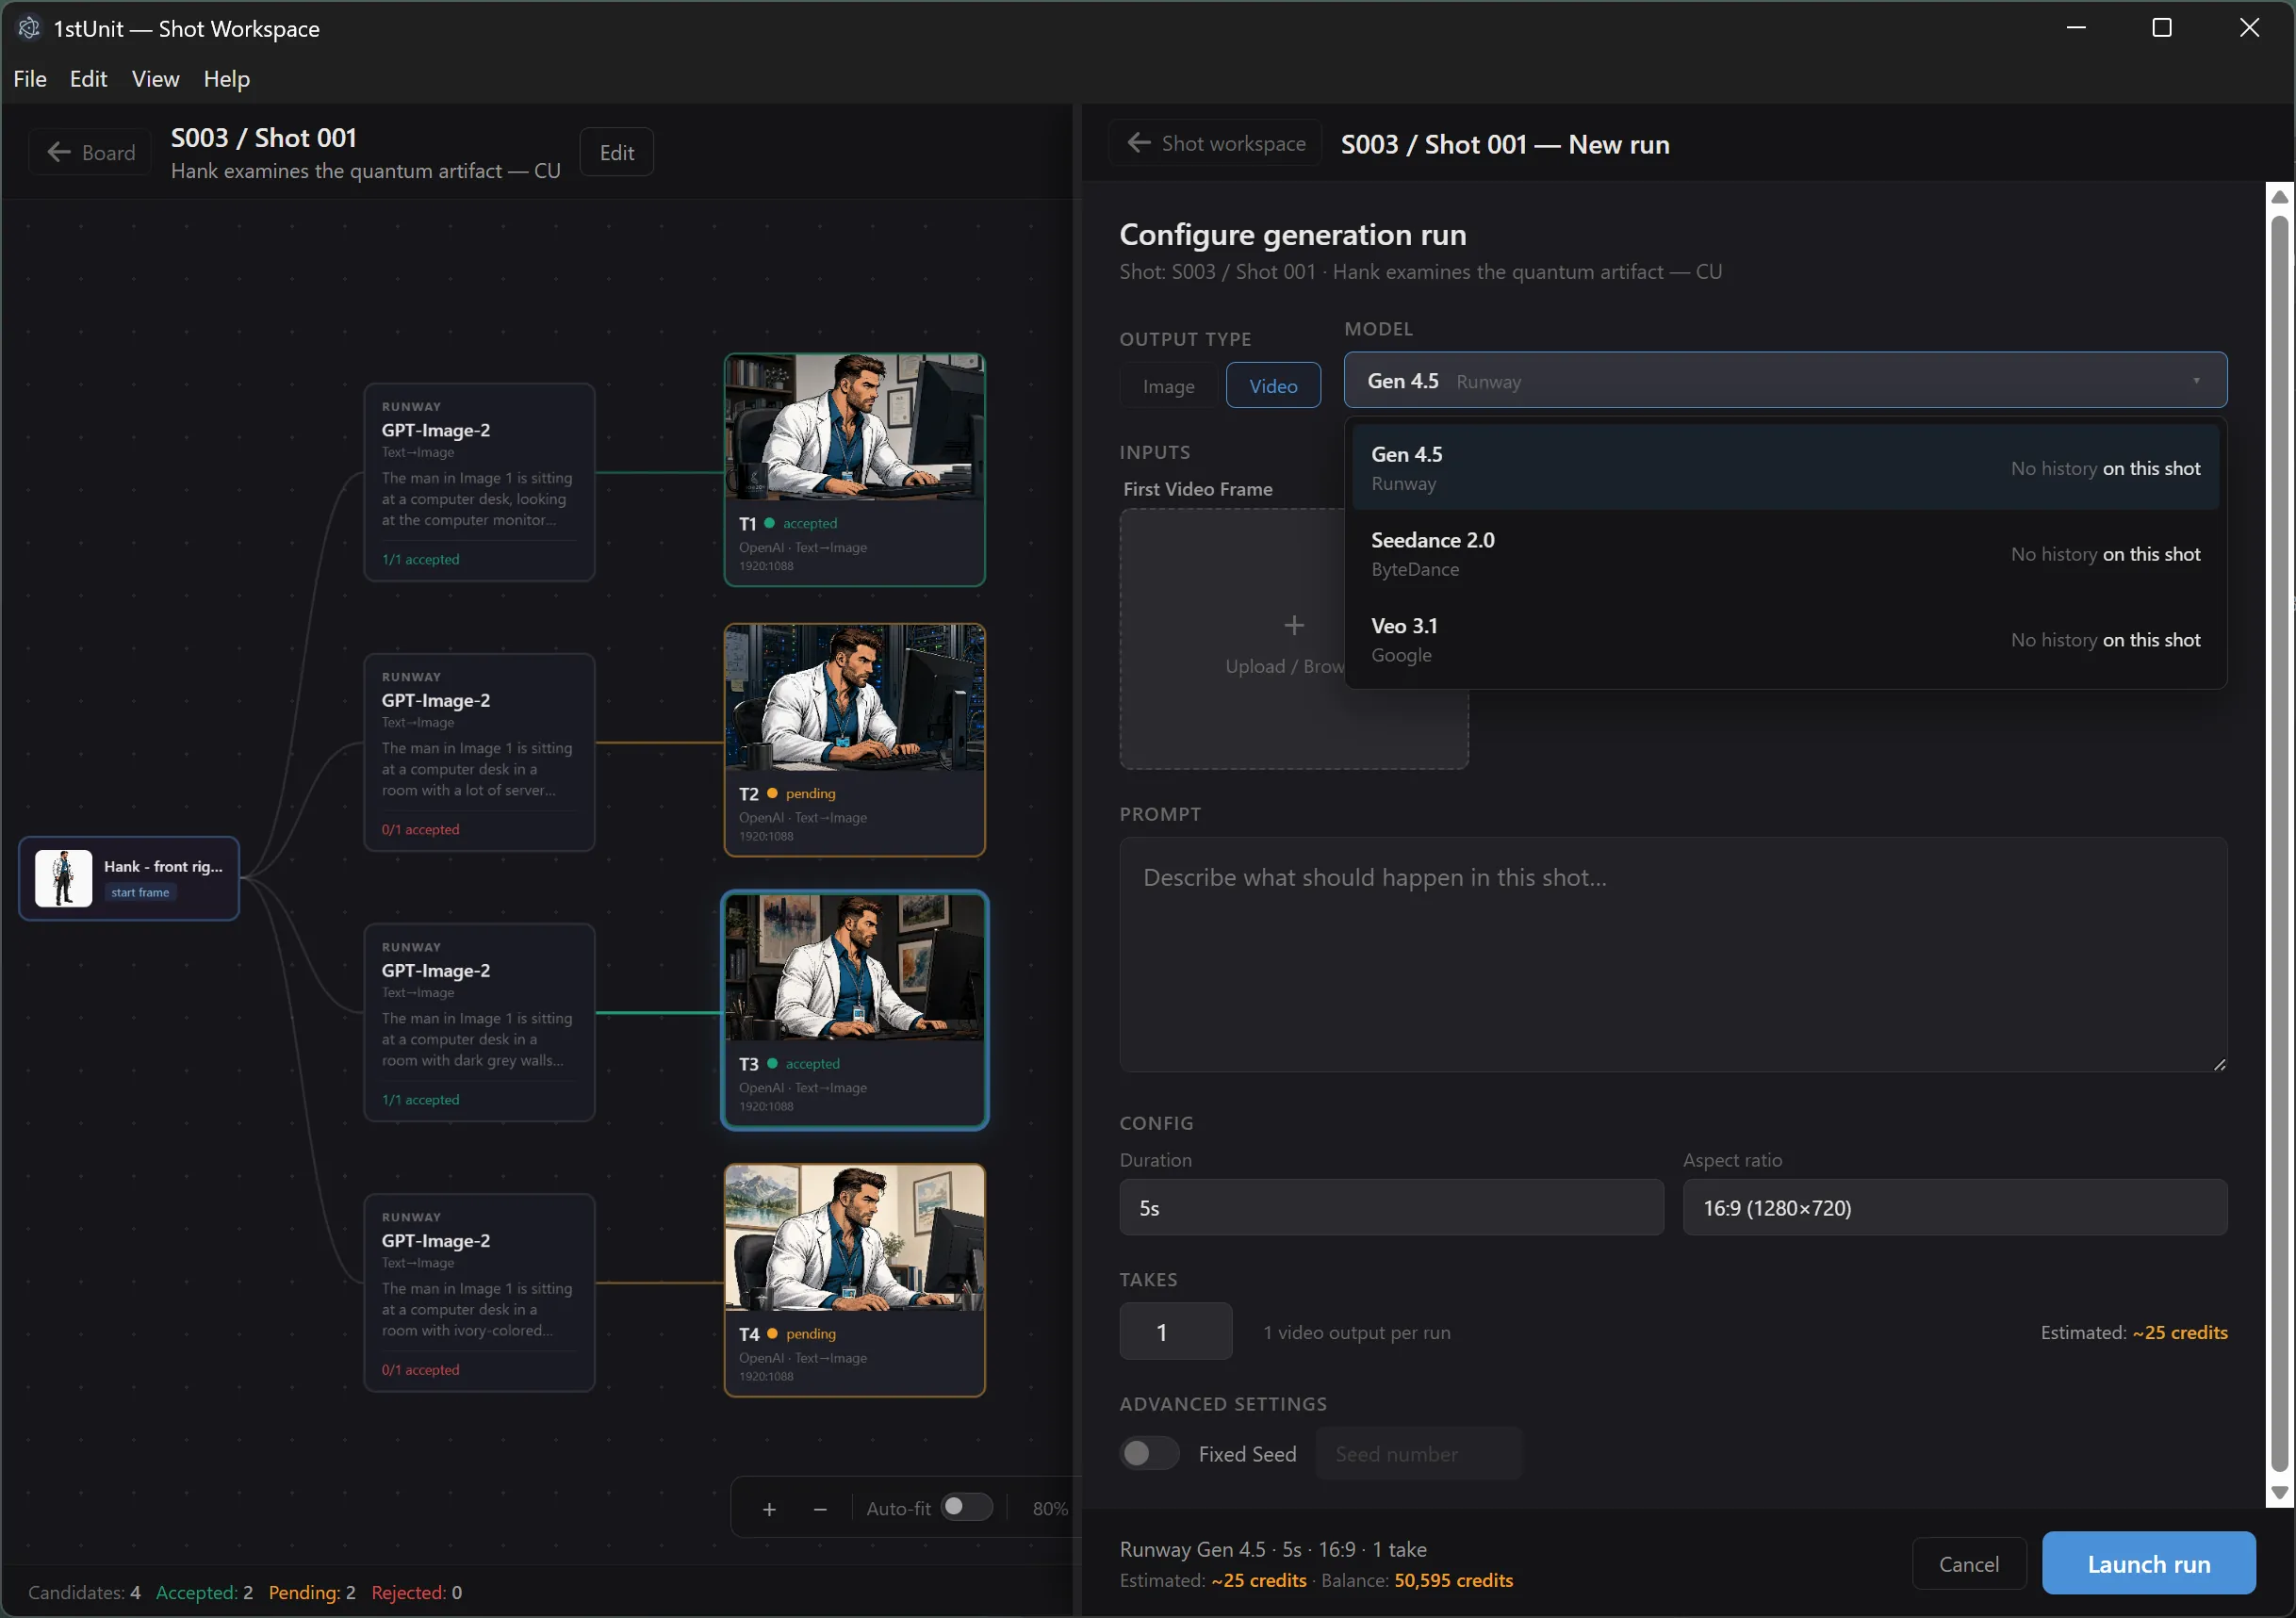
The Output type filters the model dropdown. Pick Image and you see the three image models. Pick Video and you see the three video models. The dropdown shows each model's name, provider, and recent acceptance stats so you can see what is working well for you.
If you switch Output type, the model resets to the first one of the new type. Some inputs may also be dropped if they no longer fit (for example, a video reference is not valid for image models).
Input tabs (Seedance only)
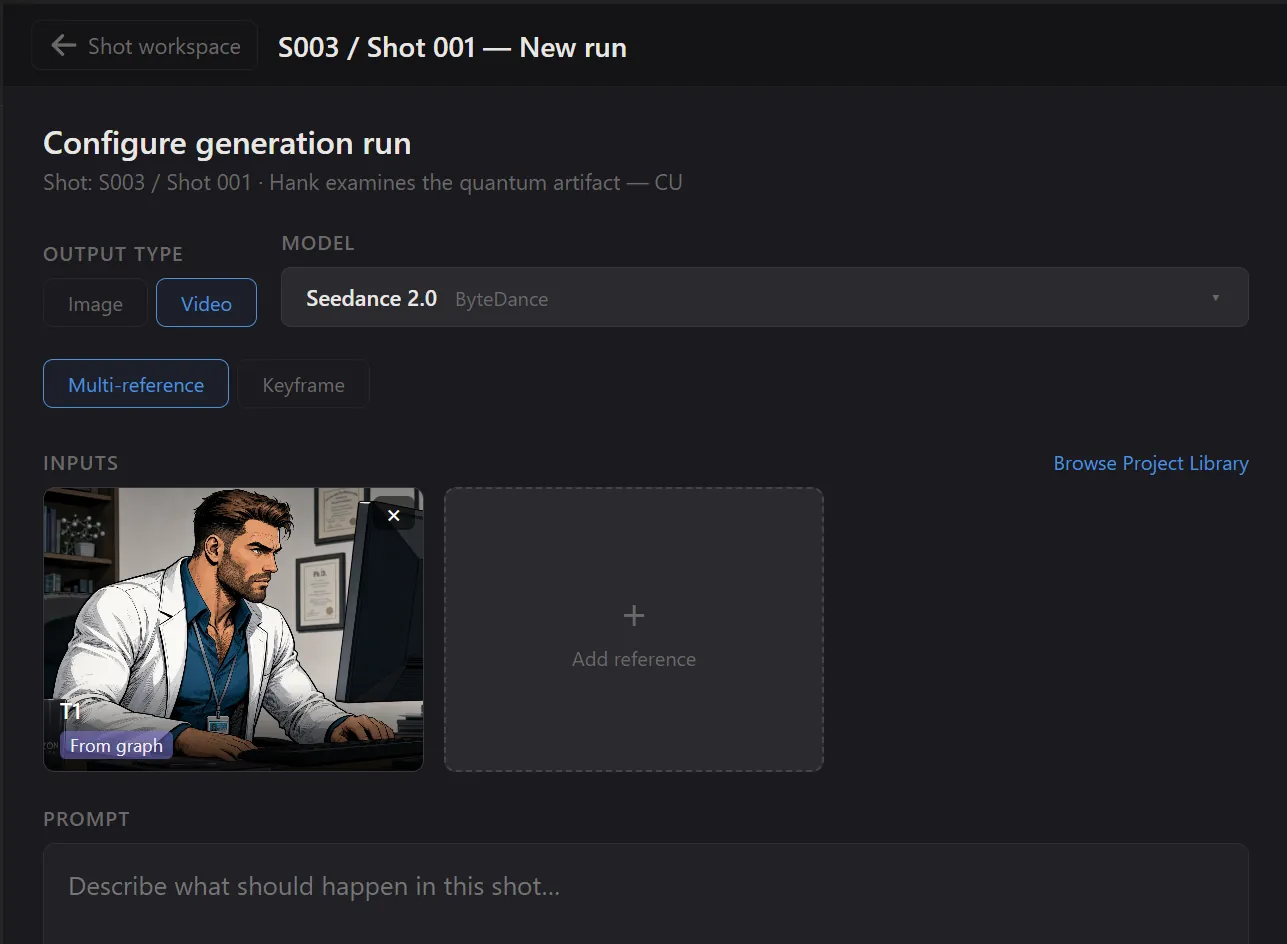
Seedance 2.0 supports two different input shapes, and they cannot be mixed in the same run. The form shows a small set of tabs above the inputs:
- Multi-reference. Pass in free-form reference images. Use this when you have a few visual references and want the model to combine their look.
- Keyframe. Pass in a first frame and an optional last frame. Use this when you want the model to interpolate between two specific frames.
Switching tabs drops any existing inputs that do not fit the new tab. The other video models (Gen 4.5 and Veo 3.1) only support keyframe-style inputs, so they show keyframe slots directly without a tab.
Reference inputs
Reference inputs are images or videos from elsewhere in your project that you want to feed into the model. All references are shown as cards in a grid, three per row on a typical panel width.
There are two kinds of reference cards:
- Free-form references. Add as many as you like. Each card has a small "From graph" or "From library" badge to remind you where the reference came from. Click the X in the corner to remove it.
- Slot references. Used for keyframes. The card label tells you whether the slot wants a first frame or a last frame. You can only fill one image per slot.
Click any empty card to open the picker. The picker first shows artifacts from the current shot, but a Browse Project Library link at the bottom expands it to the whole project. This is useful when you want to reference a character prototype or outfit that lives on a different work item.
The Char checkbox (Nano Banana models only)
For Nano Banana Pro and Nano Banana 2, each filled reference card has a small Char checkbox. Tick it for references that are images of a character. The model treats character references differently from style or environment references, and ticking the box gives it the hint it needs to apply the character correctly.
Prompt
The prompt textarea is where you write your text instruction. Plain language works. The model uses it together with the reference inputs to produce the result.
Prompts are kept as their own records in 1stUnit. When you launch, the exact prompt text is matched against past prompts for the same work item. If the text matches, the existing prompt record is reused so your lineage stays clean. If it differs, a new prompt version is saved. Prompts are never updated in place, so previous takes always link to the exact text that produced them.
Config row
One row with three settings:
- Duration. Only for video models. The choices are model-specific (for example, Gen 4.5 allows 5 or 10 seconds).
- Aspect ratio. 16:9, 9:16, 1:1, and others depending on the model.
- Resolution. When the model offers a choice (for example, 1K, 2K, or 4K on the image models).
Aspect ratio and resolution are picked independently here, but Runway expects a single combined ratio string for each model. 1stUnit handles that conversion for you under the hood.
Takes, audio, and estimated credits
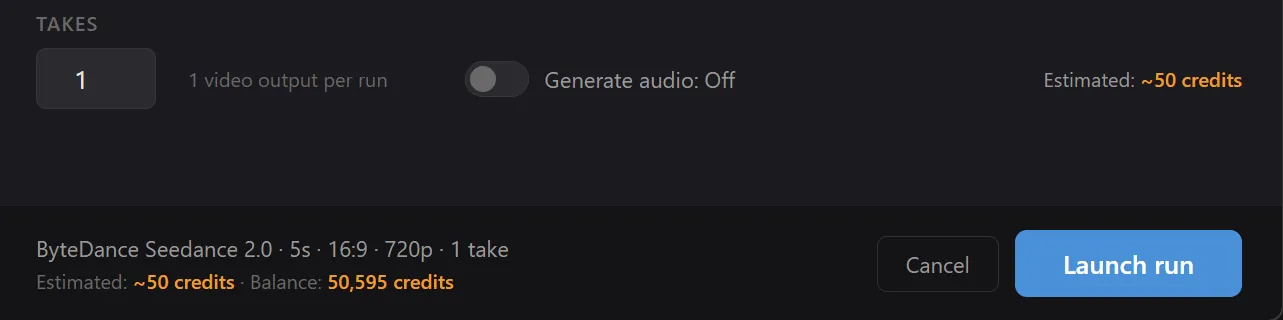
This row holds three controls:
- Takes. How many variations to generate from the same prompt and inputs. Defaults to 1. Each take consumes credits.
- Audio. A toggle that appears only for models that can produce audio (currently Seedance 2.0 and Veo 3.1). When on, the model includes a soundtrack with the video.
- Estimated credits. 1stUnit's local estimate of how many credits this run will use. Computed from the model's pricing, your duration, and the number of takes.
The credit estimate is local. Runway does not return an exact cost up front, and for some models the rates are estimates. Use the number as a guide, not a precise quote. See Credits and limits for the details.
Advanced settings
Each model has its own set of advanced settings. Currently the only one is on Gen 4.5:
- Fixed Seed. Toggle on to lock the random seed and enter a specific number. Using the same seed with the same prompt and inputs gives a reproducible result. Useful for iterating on a prompt while keeping the visual base stable.
The Launch bar
At the bottom of the form, the Launch bar shows your current Runway credit balance (fetched live when the form opens) and the Launch button. Click Launch to submit.
The run is queued and the form closes. A placeholder card appears in the Candidates tab right away, and a placeholder node appears in the Node graph. You can keep working on other shots while the run completes. When it finishes, the placeholders turn into real artifact cards and nodes.
How mode is decided
Some apps make you pick the mode (text to image, image to video, and so on). 1stUnit picks it for you based on what you set up:
- Image model: always t2i (text to image).
- Video model with at least one input: i2v (image to video).
- Video model with no inputs: t2v (text to video).
This is why dropping all inputs from a video run is meaningful: it switches the run to text-to-video. There is no separate "mode" picker in the form.
While the run is in flight
Once you launch, the run is in 1stUnit's hands. It runs in the background and you do not need to keep the form or even the workspace open. You can switch projects or close the app, and the run continues on Runway's side. When you reopen the app, 1stUnit picks up tracking right where it left off.
If a run fails (a content policy block, an upstream error, or anything else), it shows up as a failed run in the Node graph, with a red dotted border and the error message inside. No artifacts are produced.
If a run takes a very long time, 1stUnit will give up on it locally after 30 minutes and mark it failed. The credit may or may not still be charged on Runway's side, depending on what actually happened upstream.